Posts Tagged ‘FAQ’

Living Chamber

Living Chamber

Living Chamber

Living Chamber

Living Chamber

The Residential Chamber (Living Chamber / Habbitat Cell) are important for your hive because they provide space for your free worker bees.

The free worker bees will be born depending on the expansion stage of your royal chamber and they will need space. If the full number of your bee population is reached there won’t be any more offspring.

It is important to make sure that you have more space for newborn bees in your hive than you need because you can train your free worker bees to become gatherer, defender, attacker, spy, saboteur and guard bees.

Maximally, though, you can built a total of 6 residential chambers in your hive. This means for you that once the maximum number is reached, you will need to expand your residential chambers. Each new stage of expansion provides space for a further 20 bees.

Tip: Sooner or later you will need the full 6 residential chambers, to ensure a sufficient population in the beehive. Free workers you can train to become attacker, defender, gatherer, saboteur, destroyer, guard or spy bees. Since you will need many free bees for this, you should build and later expand all 6 residential chambers. If your residential chambers are full, the births of the queen are lost and you have a loss of free worker bees, which perhaps you might need.

Guards‘ Chamber

Guards´ Chamber

Guards´ Chamber

From the 5th level of your „Chamber of the Queen“ you can train your free worker bees to become guard bees. A guard bee will cost you 1,000 honey and must be trained in your guards‘ chamber. Even if you have many guard bees there will always be only one guard bee on patrol. The duration of the training is 20 minutes.

The guards serve you to fend off espionage by other hives. If another player tries to spy on your hive you have an even chance to fend off this spy.

Your guard dies when the spy succeeds in infiltrating your hive. If your guard bee catches the spy, the enemy spy dies without sending a message to its hive.

Enemy saboteurs must first overcome your guard as well. Here you have the same even chances to fend off the enemy saboteurs to protect your hive.

Tip: Because your guard tries to protect you from enemy sabotage and espionage attacks you should always have some trained guards available. If there are no guards in your hive you will never know whether there has been a spy in your hive or whether you have been sabotaged because none other than your guard bees can give you this information.

Destroyers‘ Chamber

Detroyer

Destroyer

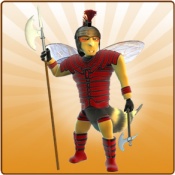
In the destroyers‘ chamber you can train your free worker bees to become destroyers. These offer you the opportunity to dismantle stages of chambers already built. Per stage you want to dismantle one destroyer bee is needed. Once it has been trained, you can go into any chamber and dismantle it by clicking on the „remove chamber“ button at the bottom.

An example: You do have a gatherers‘ chamber level 5 and want to completely demolish it, then you will need 5 destroyer bees to do this. They will all be needed in the gatherers‘ chamber for the dismantling.

The destroyer bee can only be used once and dies after having finished its work. The destroyers‘ chamber is available to you immediately.

Chat

Chat

Chat

To communicate quickly with other players in the game you can use the chat. In this chat everyone can write something, greet, ask, and just have fun.

To address an individual player, there is the red arrow. Click it and the text: @username will be transferred to the chat line. Please do not confuse this with the „whispering“ in other chats, this text can be read by any other user.

In order to write something in the chat, you just need to enter the text below and then click the send button. To reload the chat faster, you can also click the „update“ button, then the chat will reload immediately.

If you joined a people your people of course will have their own chat. To get there you just have to click the „people chat“ button in the chat. Once the chat is shown as bold you can be sure that only other members of your people can read what you write. Likewise you get back to the „main chat“ when you click on this button again.

In addition, there are moderators and of course a separate area for admins where only they can read and write.

Smilies

Here are the codes for the possible Smilies

:) :-) =)
:-/ =( :( :-(
:lol: :D :-D :/
8) 8-)
:-O :o :-o :O
;-) ;)
:-* :*
:p :-p :-P :P
:^)
]:) |-) |)
:x :X :-x :-X
:S :s :-S :-s
Tip:
In the chat you can compare notes with other players, chat, joke around and of course get help when you are encountering problems where the general help or the forum have been of no assistance. To not annoy people or misbehave, though, you should read the „chatiquette“ before which you will find above the main chat on the right side – and of course to adhere to it. Now, we just wish you to have fun chatting.

Hero Chamber

In the chamber of the hero you can equip your hero with items and strengthen him. Similarly, you can train your hero with honey which increases his vitality and energy. The higher the level of the hero, the higher is his vitality. The cost of the items also rises with the level of the hero, i.e. the higher your hero is trained, the more expensive the items are.
Wasp

Wasp

Wasp
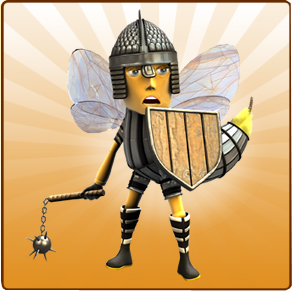
Wasp: Are you a player who focusses on both attack and defence in equal measures. Then you should choose the wasp, because it strengthens your attacker and defender bees by around 15% each.

Bumblebee

Bumblebee

Bumblebee
Bumblebee: If you are a player who prefers complete defence the bumble-bee is just the right hero for you, because the bumble-bee strengthens your defence by 30% and so ensures the security of your beehive.

Hornet

Hornet

Hornet
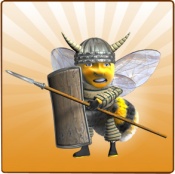
Hornet: The hornet will strengthen your attackers by 30% and so is the perfect choice for all players who focus primarily on attacking.
Tip: Since your hero reflects your way of playing, you should think long and hard about how you want to play your game. There is something to choose from for every type of player, aggressive or passive. So think carefully before you choose your hero.


With the attitude you can design and devise your hero more individually. You can for example take an attacker hero and improve him with strong defensive values, so that, in case of an enemy attack, he may defend a lot better than he would if he was simply attuned to attacking.

There are a total of 11 levels for the attitude of your hero from lout (aggressive) to „in love“.

Aggressive is consistent with the hornet, which means 100% attack. In love is the bumble-bee – and this strengthens your defence by 100%.

Importance of the Hero

Hero Meaning
Hornets can choose between the attitude stages 11 and 6 (100% – 50% attack, 50% -75% defence) (aggressive – neutral)
Wasps can choose between the attitude stages 9 and 3 (90% -60% attack, 60% -90% defence) (fighter – sweetie)
Bumble-bees can choose between the attitude stages 6 and 1 (75% -50% attack, 50% -100% defence) (neutral – in love)

The attitude at a glance:

Attitude Attack Defence
Lout 100% attack 50% defence
Rowdie 95% attack 55% defence
She-goat / he-goat 90% attack 60% defence
Prankster 85% attack 65% defence
Rascal 80% attack 70% defence
Normalo 75% attack 75% defence
Cutie 70% attack 80% defence
Softie 65% attack 85% defence
Sweetie 60% attack 90% defence
Cuddly pet 55% attack 95% defence
In love 50% attack 100% defence

Buy Items

At midnight you always get 4 new items to choose from, which don’t get updated during the day unless you buy new products for 1 Gelee Royal.

To see which functions an item has, just click on it and then in the box „item information“ you can read what the various items strengthen, and by how many per cent.

In order to purchase items, you just have to pull them in the brown box, your so-called backpack, and then the honey will be deducted from your stockpile. From this moment on the items are yours already. But in order to let them really help in your hero’s fight you have to drag them to your hero. If you do not have enough honey in stock for an item, you can not buy it.

You can buy a maximum of 13 items. 5 items van be positioned on your hero and 8 items you can store or keep in your brown box, your backpack, exchanging them with an item already on your hero according to the situation.

Remember, however, if your backpack is filled with 8 items, there is no place to store an item your hero casts off to exchange it for another. You should take care that there is always at least one free space in your backpack.

Sell Items

You can sell items as easily as you can buy them. You just have to drag the items with your mouse from the brown box to the dealer. Note, though, that only 50% of the purchase value will be refunded for premium players.
Change Hero

Often players made mistakes with their choice of heroes and later had to act with a hero not to their liking with a game tactic that didn’t match their own. But now you can finally still change your hero later. For 10 Gelee Royal you can simply change your hero by clicking on one of the hero pictures highlighted in grey (shown in red in the illustration).

Change Hero

Change Hero

Afterwards you have to confirm once again that you really want to change your hero. When changing heroes the values achieved don’t get set back – they persist.
Statistics

statistic menu

statistic menu

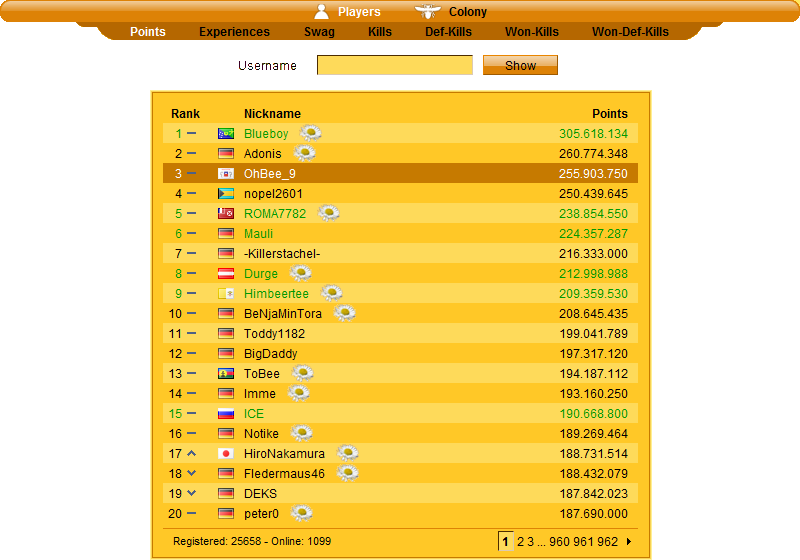
The statistic gives you an overview of your ranking in the entire game. You can fight to get to the very top in the point statistics, in the prey statistics, and in the kills as well as in the def-kills statistics. In order to get to the statistics you have to click on „statistics“ in the menu which you will find below the chat and then you will see the point statistics of the players.

Statistic

Statistic

Statistic Explanations
Point statistics: Here all your points and expansions are added together, which will give you an overview of where you stand compared to other players in the overall statistics. Moreover, the best players, the top players in the point statistics, can take part in a final battle where the heroes will fight against each other.
Prey statistics: Here all the players are listed who have succeeded in capturing honey from others. It is important in that you can see from this statistics whether a player is aggressive and belligerent or not.
Kills statistics: In the kills statistics you will see whether a player has a strong offensive or a not so strong offensive. Here every bee is counted you or another player has destroyed during an attack.
Def-kills statistics: The def-kills statistics shows whether a player prefers a strong defensive. Who’s on top in this statistics will probably have a strong defence. If your defender bees fend off an enemy attack successfully, those kills go into your „def-kills statistics“. Even with lost defences those kills you have caused for your attacker go straight into the def-kills statistics. This also includes your defender kills when you have sent out your defenders to support another member of your people.
Experience points The experience points are established by all the actions in the game. The way each action effects those points will stay a secret. We will only reveal that nearly every click in the game will make your experience points grow and rise.

You can also change from the player statistics to the people statistics. In the people statistics you can see all bee people. Here all the points of each member of the people will be added so that there will be a score for each people consisting of the points of its members.

Likewise it will be done for the prey statistics. Each member of a people contributes to the score in the prey statistics. The kills and def-kills statistics will be handled in the same manner, as well as the experience statistics. Every offensive and defensive kill of a member of a people will be added to those of the other members of the people and so results in the final result and the score of each people.

Statistics Calculation:

((Sum of all levels including meadows, without the queen chamber squared) * 10) * ((Level of the queen chamber) * 20) / (number of chambers, including queen chamber without meadows)

Example:

6 residential chambers (levels: 11, 13, 14, 14, 15, 15) = 82

6 larders (levels: 10, 11, 11, 11, 12, 16) = 71

2 defenders‘ chambers (levels: 21, 21) = 42

1 attackers‘ chamber (level: 5) = 5

1 collectors‘ chamber (level: 11) = 11

4 meadows (levels: 2, 7, 7, 7) = 23

1 royal chamber (level: 21) = 21

= ((82 +71 +42 +5 +11 +23) ²) * 10) * ((21) * 20) / 17 = 13,527,952 points

Defenders‘ Chamber

Defender

Defender

Defenders'

Defenders´ Chamber

Like the attackers‘ chamber you can expand your defenders‘ chamber only from level 5 of your „Chamber of the Queen„.

In the defenders‘ chamber you can train your free worker bees to become defenders which will protect your beehive from enemy attacks.

Also for your defenders‘ chamber applies the same rule – the higher the chamber, the more defenders you can train. But you also have to expand each defenders‘ chamber individually , so that your defender bees can gain their full strength.

If your defender bees fend off an enemy attack successfully, the kills go into your „def-kills statistics“. Even when you lose and the attack is successful the kills you caused for the attacker will go into the def-kills statistics.

You can also send your defender bees to other players to protect the beehive of another member of your people. For this you just have to go into your Chamber of the Queen, enter the name of the player you want to support and the number of defenders from the individual defenders‘ chamber you want to send out and then your bees are already on the way.

How long your defender bees will need to get to the other hive you will see by the time shown in the defenders‘ chamber.

The kills you cause while supporting other hives will go into your def-kills statistics, too.

Tip: Try to always expand your defenders‘ chamber as high as possible and match your fighting strength to the expansion stage. That way even numerically fewer defenders may be able to fend off a much greater army of attackers.

Spy Chamber

Agent

Agent

The spy chamber with the spy bees is available to you from the 5th level of your royal chamber.

In this chamber, you can train any free worker bee to become a spy bee for 1,000 honey. The training lasts 20 minutes per bee.

Your spy bees can spy on other beehives and will give you useful information. But not every intelligence flight is successful. If the player you want to spy out has a guard in his hive, you have, as well as he, an equal percentage chance to succeed.

If the guard bee of your opponent doesn’t detect your spy bee you get the useful information. If you are discovered, your spy bee won’t come back alive.

In order to get to the spy chamber you must first click on the Chamber of the Queen to get to the spy chamber from there.

You can enter the name of the player you want to spy out and then send out your spy bee.

By the time you’ll see how long it will need to get to the other beehive.

Tip: Before you attack an opposing player you should always spy him/her out before to get as many information about him/her beehive as possible to protect yourself against losses.

If you are out for attacker kills, you can of course look out for defenders. How you use your spy is left to you, but you should send the spy out as often as possible before the attacks, so that there are no unpleasant surprises.

Saboteur’s Chamber

Saboteur

Saboteur

The saboteur bee is responsible for manipulating the hive of an enemy, so that it is no longer properly working in the chamber or meadow hit by the sabotage.

To manipulate a chamber or meadow, the saboteur bee has to defeat the guards of the hive you aim to sabotage. There the sabotage bee has an even percentage chance to succeed.

After successful penetration of the opponent’s hive via a random value one of the chambers or meadows gets selected. It does not matter whether this is empty or expanded. However, it should be noted that the Chamber of the Queen cannot be attacked by sabotage.

After one of the targets has been selected a new random value now decides between three different actions. It may be that the alteration, i.e. the dismantling or expansion of the cell/chamber will be be prevented. The second alternative is that the training of certain bees, such as collector, attacker or defender bees, may be disrupted. The third possibility is that the sending of bees from this chamber will be prevented, which means that no defenders can be sent as supporters, no collector bees can be sent to collect honey and the function of the attack is blocked as well.

In an attack on a chamber or meadow which does not offer the possibility of training bees, the expansion and dismantling is chosen as the kind of sabotage taking place automatically. Similarly, the expansion of an empty honeycomb is prevented automatically, should it be hit via the random value.

All successful manipulations will last 6 hours. If you get hit by a saboteur attack yourself, the chamber concerned is defective for 6 hours. If by chance a second saboteur attack hits the same chamber or meadow again the time of the second attack is decisive; the times are not added. In this case the chamber is fully functional again 6 hours after the second attack.

Map

Map

Bee-Map

On the map you will find all registered players with their beehives. Once you click on the icon „map“ in the menu, the map opens.

Map

Map

When the map appears, you will see your own beehive in the middle with all the other hives in your direct neighbourhood. By simply clicking on your own hive or other hives a new menu will open on the right side, where you can see the coordinates of the player’s hive, his player name and if applicable to what people he belongs to.

In addition, you can attack him/her and spy on him/her. You can also have a look at his/her profile or send him/her a message.

To have a look at beehives outside your neighbourhood, you can click yourself through the meadows using the navigation arrows next to the map. If a hive is outside of your ring, it is presented somewhat fainter.

Beehives presented as broken-down have been abandoned for at least seven days. Which does not mean that these hives are empty of honey or defender bees. Should the player decide to login again his hive will again be shown as a „whole“ hive.

You can also move your hive. You must note, though, that since the users are placed circularly, i.e. ring-shaped, positions can only be changed within such a ring or you can move nearer to the ring center, where the – possibly – stronger users are placed because they have been playing for a longer time. Also you can not move every day, but must wait a while, sometimes shorter, sometimes longer, depending on your status (premium or non-premium). When you will next be able to move your hive, is shown on the right side of the bee map.

Tip:

Try to find potential targets for attacks on the map, but consider that those attacked will certainly fly a counter attack. Therefore, it would be tactically unwise to choose the strongest opponents. With the map, you can check where your opponents are, the duration of your flight time for an attack and the expansion stages of your potential targets for attack.

Over night, it would certainly make sense to fly longer distances so that after a possible successfill robbery of honey you will not expose the honey unprotected in your own hive before you come online again. During the day attacks over shorter distances do make more sense, because then you can send out your attackers several times to different targets.

Profile edit & design

Profil Edit

Profile Edit

Profile / Edit

Profile / Edit

In order to get to your profile, you need to click the „profile“ button in the lower menu. Here you can adjust several features. For one, you can change your password and your birth date. Then, you can choose your gender and enter your location.

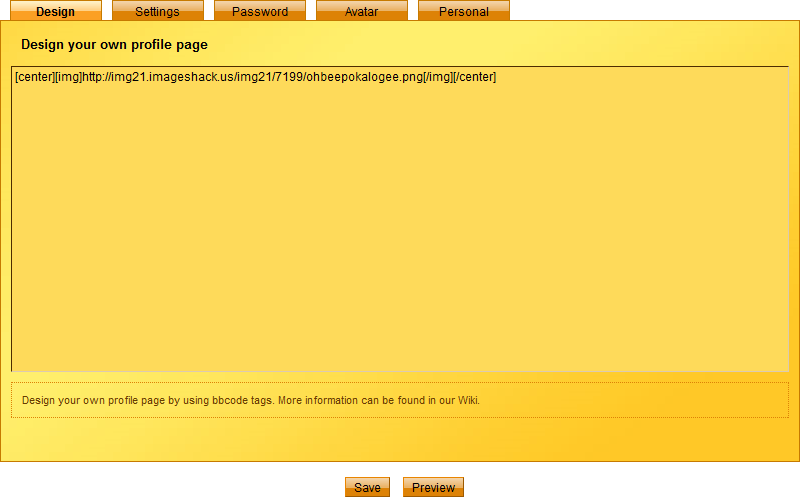
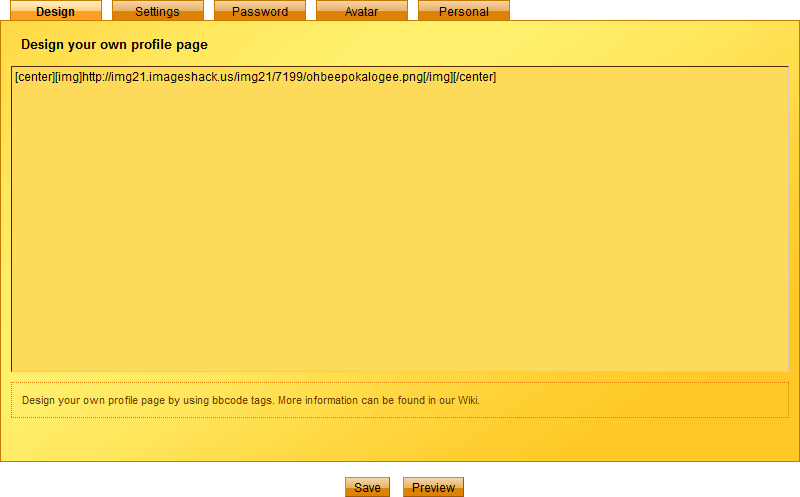
Most important is probably the function to edit the profile. In the large central window, you can use the codes you like to create your own page as you desire. Your imagination has no limits. To view your profile, you can then click the „preview profile“ button. There you will then see the profile you designed.

In addition there is the option to delete your account, so be very careful with your password so that you don’t find your account deleted one day by someone else.

Premium users have an additional button „Avatar“. Here you can upload your own avatar. Images must be in one of the following formats: .jpg. .gif or .png. The image file size must not exceed 1000 KB.

The image size should be 100 x 100 pixels, although there is a function that cuts larger pictures, but you can never be sure whether the image section selected is the one you want to be presented.

edit profile

edit profile

Tutorial – Edit Profile

To explain the upload of pictures to the profile to all we will show you in this tutorial how it is done.

1. Selection of the image

For the selection of the image you should take care that the image is not protected by copyright and that it contains no forbidden characters, symbols, etc. If this is not the case, you must first store it on your own hard disk.

2. Upload

To upload the image, you have to save it on a webserver. This can be done on your own server or a public one, such as for example www.imageshack.us.

Note: At imageshack.us you have to click on the plus at the bottom and take the local link.

3. Embed

If the image has been uploaded, you can embed it in your profile with the correct URL address. Simply copy and paste the URL and embed it between the codes.

For checking the image you can simply open a new window in your browser and then enter the URL. If only your image displayed, you have the correct URL link.

Now you can embed the picture between the different codes.

4. Save

Then first save your profile before you have a look at the preview.

Profile Codes for editing your profile

Name Code
Font bold [b]Text[/b]
Italic font: [i]Text[/i]
Font underlined [u]Text[/u]
Text alignment center [center]Text[/center]
Text alignment right [right]Text[/right]
Text lists
[list]
Text 1
Text 2
[/list]
Images [img]https://www.bebees.com/ownpictures.jpg[/img]
Links as a direct link [url]https://www.bebees.com[/url]
Links with text [url=https://www.bebees.com]Text from the link[/url]
Links with picture [url=https://www.bebees.de][img]https://www.bebees.com/ownpictures.jpg[/img][/url]
Text color highlighting for a short text [color=#FF0000]Red Text[/color]
Text size [size=20]big Text[/size]
Background image [bgimage]https://www.bebees.com/ownpictures.jpg[/bgimage]
Background color [bgcolor]#FF0000[/bgcolor]
Global text color [txtcolor]#FF0000[/txtcolor]
Global link color [linkcolor]#FF0000[/linkcolor]
Text color for limited text [color=FF0000]red Text[/color]
Text size [size=24]big text[/size]
Link to player [player]name[/player]
Link to colony [colony]colony[/colony]

Some examples for colors:

Colour Code
Yellow #ffff00
Red #ff0000
Blue #0000ff
Black #000000
White #ffffff
Purple #800080
Green #008000
Orange #ffa500
Silver #c0c0c0
Gold #ffd700

In order to get more colors, you can change the individual numbers from 0-9 and the characters a – f arbitrarily or check the internet for „color codes“.

Tip: Optimum width for a background image, which appears without repetition, should be 1000 pixels. Moreover, it should not contain too many different colors, because if you want to write something over it it will be difficult to find an optimum text color so that you can easily read everything.

Similarly, you should make sure that your picture and your profile are not sexist, pornographic or otherwise of a nature unsuitable for minors or contain a link to an adult website or breaking otherwise the law.


Chamber of the Queen

Queen

Queen

Chamber of the Queen

Chamber of the Queen

In the Chamber of the Queen all new bees are born. The higher your Chamber of the Queen is, the more bees are born.

In addition, you must remember that none of your chambers can be higher than that of your queen bee. That means for you that if you want to expand a chamber you first have to expand that of your queen.

Therefore you must also make sure that your larders always hold enough honey.

Furthermore, the rank of the expansion of your Chamber of the Queen has influence on the beginner’s protection, because until the 5th level noone can attack you and you can not attack others.

As soon as you have reached the Chamber of the Queen level 5 you can join a people. Then you can also build an attackers‘ chamber or a defenders‘ chamber. Note, however, that once you have got to level 5 you can be attacked by others. Therefore, it is advisable to expand every other chambers to the level of the Chamber of the Queen before you cross the threshold of the beginner’s protection.

From level 10 of the royal chamber onwards you can create your own nation. From the 10th level onward you also have a spy bee available to you to spy on the other hives, without being caught. Similarly, you can train saboteur or guard bees from the 5th level of your Chamber of the Queen. The destroyer bee is available to you from the start.

In the Chamber of the Queen you will also find the chamber of your hero and your „special forces“ bees.

Chamber of the Queen

Chamber of the Queen

Tip:

The Chamber of the Queen is the one chamber everything in your beehive rotates around. I.e. there can be no chambers higher expanded than that of your queen. The Chamber of the Queen and its expansion stage defines when your attack protection ends (from level 5) and when you can build attackers‘ and defenders‘ chambers (also from level 5). The protection of your complete honey store also depends on it. Likewise, the training of your special bees depends on your royal chamber.

This means you should carefully consider whether you will quickly expand the Chamber of the Queen or wait until you have similarly expanded all the other chambers. We recommend the latter, to first get everything expanded to the same level and only then expand the royal chamber further.

Messages

messaging

In order to receive or write messages, you have to click on „messages“ in the top menu. If you’ve done this, a small menu opens with the items „inbox“, „outbox“, „battle reports“, „hero fights“ and „new messages“.

messages-menu

Unread:

Here you find all unread to messages.

Inbox:

Here you’ll find all your new messages and notes from other players. Then the system messages will arrive here as well, such as „collector reports“ or messages if there was an „intruder detected“ or a „guard is missing“. Similarly, you can check up on the „sabotage of player XYZ“ messages here.

Outbox:

In the messages outbox, all outgoing mail messages are stored which you have written to other players.

Battle Reports:

If you have been attacked or have attacked other players, a battle report will appear in this folder. You can tell the messages apart by their subject.

Hero Fights:

After every hero fight you can look up the results in this messages folder.

Archive:

In archives you can store important messages for you. These are not deleted.

New Message:

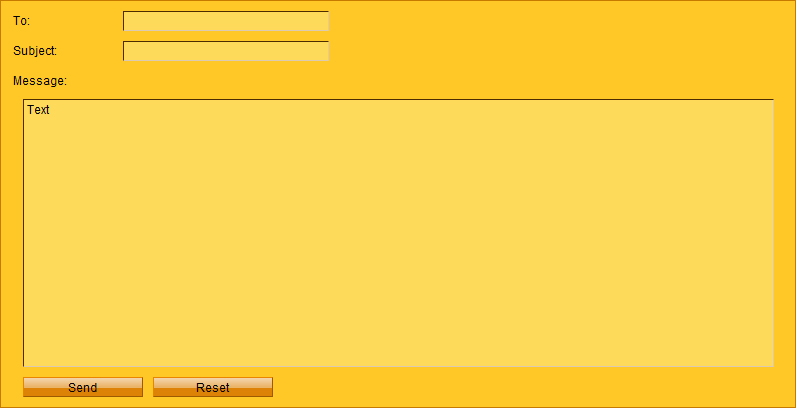
To write a message, you must enter the recipient and a subject. The subject stands for a headline. All three fields must be filled, otherwise the transmission is not possible.

Write Messages

Write Messages

Attention:

read private messages deleted in 120 hrs
read non-private messages deleted in 72 hrs
unread private messages deleted in 240 hrs
unread non-private messages deleted in 240 hrs

Gelee Royal

What is Gelee Royal?

Gelee Royal belongs to the rarest forms of the so popular sweetener at Bebee. This extremely rare nectar can only be produced by the queen of a beehive and can only be found accidentally by your collectors on the vast meadows. It is also worth noting that the Gelee Royal of your own queen can not be used – because she gobbles it all up herself immediately.

If your collectors come back to your beehive with Gelee Royal, they are likely to have found an abandoned beehive, where the luxury honey has been left behind. But remember that the finding of Gelee Royal is always a matter of pure luck. It may therefore be a while before you have collected larger quantities of this coveted honey. But of course you can simply buy Gelee Royal as well.

How do use Gelee Royal

With Gelee Royal various actions can be accomplished in the game, sometimes actions can be accelerated and sometimes they can only be accomülished with Gelee Royal at all. There are several ways for using Gelee Royal. For example, you can use this rare nectar to accelerate building/expansion assignments or the training of bees and can reduce waiting times, like at the dealer, who has new products for you only once a day.

1. Reduction of time for building/expansion assignments

fdfddf

Reduction of time for building/expansion assignments

Step Action Implementation
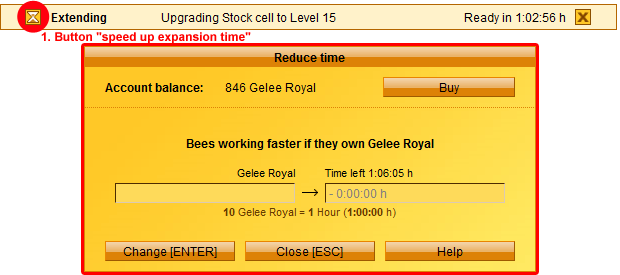
1 Press the button „speed up expansion time“ After having begun with an expansion or the training of one of your bees to become a collector, attacker, defender, sabotage, guard, spy or destroyer bee you can use your existing honey to speed up the construction/training time. For this you only need to click on the „hourglass“ in front of the building for which building time should be speeded up.
2 Open the „exchange“ window After the first step has been done, you can „bribe“ your workers in the exchange window opening up with Gelee Royal, so that they speed up their works or their training. Per 1 Gelee Royal your bees work 6 minutes faster.
3 Input in the exchange window You can now enter your amount of Gelee Royal and see immediately how much time you will win by it. If you want to accept, just order the speeding-up by clicking „enter“ or „exchange“. The amount of Gelee Royal entered will immediately be subtracted from your account.

2. Exchange Gelee Royal for honey

"exchange" button

"exchange" button

Step Action Implementation
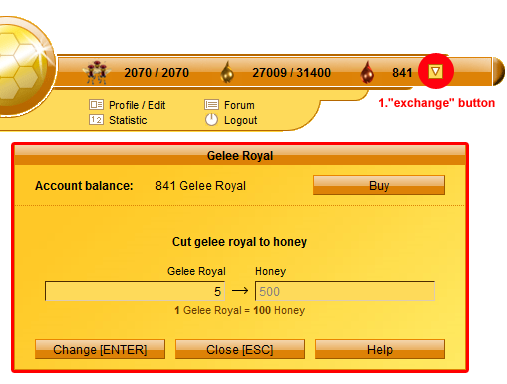
1 Press the „exchange“ button You can exchange your complete stock of Gelee Royal for honey. The amount of Gelee Royal you have bought can likewise be diluted with honey to fill your honey store. Just click on the Gelee Royal button for this.
2 Open the exchange window After the first step has been done in the exchange window which has opened up you can dilute your Gelee Royal, so that your store fills up with honey. Per 1 Gelee Royal diluted you will receive 100 honey.
3 Input in the exchange window You can now enter your amount of Gelee Royal and see immediately how much honey will be credited to you for it. If you agree you can dilute your Gelee Royal by pressing „enter“ or „exchange“. The amount of Gelee Royal entered will immediately be subtracted from your account and, converted to honey, credited to it.

3. Buy items and „bribe“ the dealer

Hero-Items

Hero-Items

Step Action Implementation
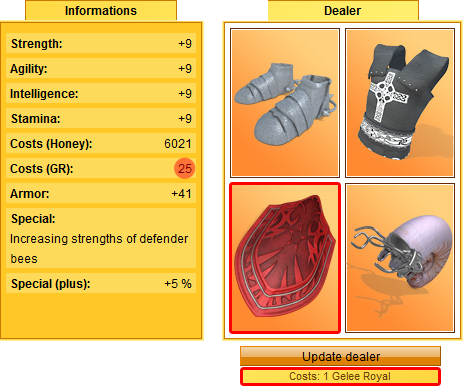
1 Click on the hero’s item To dress your hero with items in most cases you have to pay with Gelee Royal. To see how much honey one item costs and how much Gelee Royal is demanded for it you only have to click on one of the four items shown to you. Now you can see the prices in the „item information“ box.
2 Buy hero items Now you can pull the item you have chosen on your „own items“ field. The honey and Gelee Royal you have to pay for it will immediately be subtracted from your account. If you should not have enough of one of those payments there will be an error messages and you can’t buy this item.
3 „Bribe“ the dealer If once there is no item you would like to buy you can bribe your dealer with 1 Gelee Royal and then he will show you four new items. But the items shown before are then gone for ever! Now all the steps begin again – click on an item, see the price in honey and Gelee Royal and then buy it or don’t buy it and then bribe the dealer or wait 24 hours, and then he will show you new items voluntarily
Tip: You should always treat your Gelee Royal as something rare and precious, because it is a rare nectar. Therefore you should always consider carefully where to apply it and think about it beforehand three times. Most well spent it is for the items and speeding up building/expansion assignments.